Wednesday, 16 December 2015

Loungewear: Drapey top and sweatpants

Hello all! When I was choosing my Minerva projects I was thinking about the holes in my wardrobe and I realised that I lacked loungewear for after uni and the weekends when I'm just chilling in halls. So, I found this grey knit fabric for some Hudson pants and picked out a floral jersey for a loose t-shirt.
The top was copied from a RTW top I've owned for years and really needs replacing now It's really simple with 2 seams and dolman sleeves which makes it really quick to sew up. Or rather it would have been really simple to sew up without all of the adjustments I had to make.
It ended up being a tad too tight pretty much everywhere for some reason, so I had to unpick all of the seams and sew them at a smaller seam allowance. I also added some triangular gussets to the side seams to give me more room in the hips. After those adjustments I'm really happy with it. The jersey fabric is really soft which makes for a really comfortable top that you don't really realise that you're wearing.
I used hemming tape for the first time for the hem and the sleeve hems and it's amazing! I've come to the point where I like all of my garments to have a hem but hems can go very wrong in jersey. This tape stabilizes it and makes it look a lot more polished. 

For the sweatpants I went up 2 sizes as I wasn't convinced that they would be stretchy enough in my regular size and thank goodness I did because this size is perfect for this fabric. 1 side is softer than the other so I made sure that the softer side was next to my skin for maximum comfort. I've been wearing this outfit all day and I am so so comfy! I think both the top and the bottoms will get to the top of the most worn list very quickly.

Thanks for reading, to Ed for taking photos and to Minerva Crafts for supplying all of the materials in this kit!
Lauren xx


Tuesday, 1 December 2015

Stripey knit dress

Hello all! I liked my knit dress from a couple of weeks ago so much that I decided to make another, with a few modifications.
I'm quite particular about striped fabric and for me the perfect stripe is the thinner white stripe widely spaced on a navy background. I've been looking for this kind of stripe for a while and was so excited to find it at Guthrie and Ghani during the Birmingham meet up. It's also available online here.
I was expecting it be a fairly quick make because I'd already blended together the 3 patterns to make my last knit dress. (Zeena sleeves, RTW top and pencil skirt pattern) but I forgot how long stripe matching takes! 
Sewing the stripes was a little hard because the stripes of the fabric are raised, and you have to allow for that when pinning. I found that by pinning them a little out of sync they would match up as they went through the sewing machine. Other than the stripe matching it was a really quick sew as there was only 2 side seams, the neckband and turning up the edges of the hem and the sleeves. 
I really love the simplicity of this dress. It can be paired with so many things! The knit fabric makes it really comfortable to wear which is ultimately what I look for in all of my clothes. If I find some more knit fabric, there will be another in my future!
Thanks for reading and to Edward for taking pics!
Lauren xx

Monday, 16 November 2015

Freehand Fashion: Asymmetrical peplum jacket

Hello all! I'm really excited to be part of the blog tour for Chinelo's new book: Freehand Fashion. It's primary purpose is to show sewers how to draft things straight onto fabric without using a pattern. It was a very interesting technique for me to try and to compare to the flat pattern drafting and draping on the stand that I've learnt at uni in the last month or so.
Basic sewing techniques feature at the beginning, followed by a handy measurements table that you can write your measurements into. I found the diagrams really useful to show me where each measurement should be measured from which made them as accurate as possible. I recommend double checking them, because if they aren't accurate your finished garment will not fit as well.
There are 15 projects in the book of various difficulties using either the bodice block, dress block, flare block or sleeve block as a base. I chose to make the asymmetrical peplum jacket as I was in the market for a new coat as it's getting colder. Fabric needs are noted separately for each pattern piece which makes it a bit of a faff to work out how much you need in total. Although if you were planning colour-blocking it's really useful. I guessed 2.5m and I used about 1m less than that, though I did reduce the flare in the peplum.
And here is my finished jacket! It is somewhat inspired by Diors famous 'new look' although I couldn't quite achieve the corseted silhouette which makes his design look so sharp. I purposefully took out most of the flare, making it 1/4 circle instead of the full circle, my reasoning being that it would be more wearable with fuller skirts. I kept it symmetical but now I look at the pictures, I think it would look really good if it was asymmetrical. I do think it needed a little more fullness for it to sit better around the hips.
The instructions for the jacket tell you which steps of the bodice block are relevant for this project. The sleeve block and the flare block were also used. I did all the drafting on paper so if there were any adjustments needed they would be easier to apply to the outer fabric (I used the lining as a mock up). I did have to recut the sleeves because I got the measurements completely wrong.
Fitting wise, there is some excess fabric at the back armhole and the shoulders are too wide but I'm really pleased with the fit of the front bodice especially. Although more ease would need to be added if I wanted to wear more than one layer under it.
I love the massive collar,, although it would be interesting to see whether it would behave differently if cut on the bias. 
Finishing wise the jacket is fully lined in a contrasting black lining. I lugged my sewing machine home for the weekend (I had to go back to get my braces tightened, joy of joys) and only realised when I got there that the cable was sitting on my desk in my uni room! So I had to construct the outer of my jacket using the overlocker and sew the hem and armholes by hand because I then ran out of overlocker thread. I used poppers to fasten the jacket for a more streamlined look. There is a running stitch down each side of the lining which it needed to keep it from peeking out.
All in all, it was really interesting to try a new way of drafting patterns. It's definitely quicker to do than the flat pattern drafting method I've been taught. I think it may be more straightforward to follow if you have no drafting experience because I kept second guessing the instructions, and actually if you just follow them, surprise surprise, it works!
I have a copy of Freehand Fashion to give away! (UK only) Just comment below and make sure that your email address is easy for me to find.
These are the other people taking part in the blog tour:
Some have already blogged about their creations and some will be blogging them this week.
Thursday 12th November
English Girl at Home http://englishgirlathome.com/
Friday 13th November
Saturday 14th November
A Stitching Odyssey http://www.astitchingodyssey.com/
Sunday 15th November

Monday 16th November
Lady Sew a Lot http://ladysewalot.blogspot.co.uk/    (Me)
Tuesday 17th November
Wednesday 18th November
House of Pinheiro http://houseofpinheiro.com

Thanks for reading, to Pavilion Crafts for asking me to review the book and to Ed for taking photos!
Lauren xx

Wednesday, 11 November 2015

Floral Button-down skirt

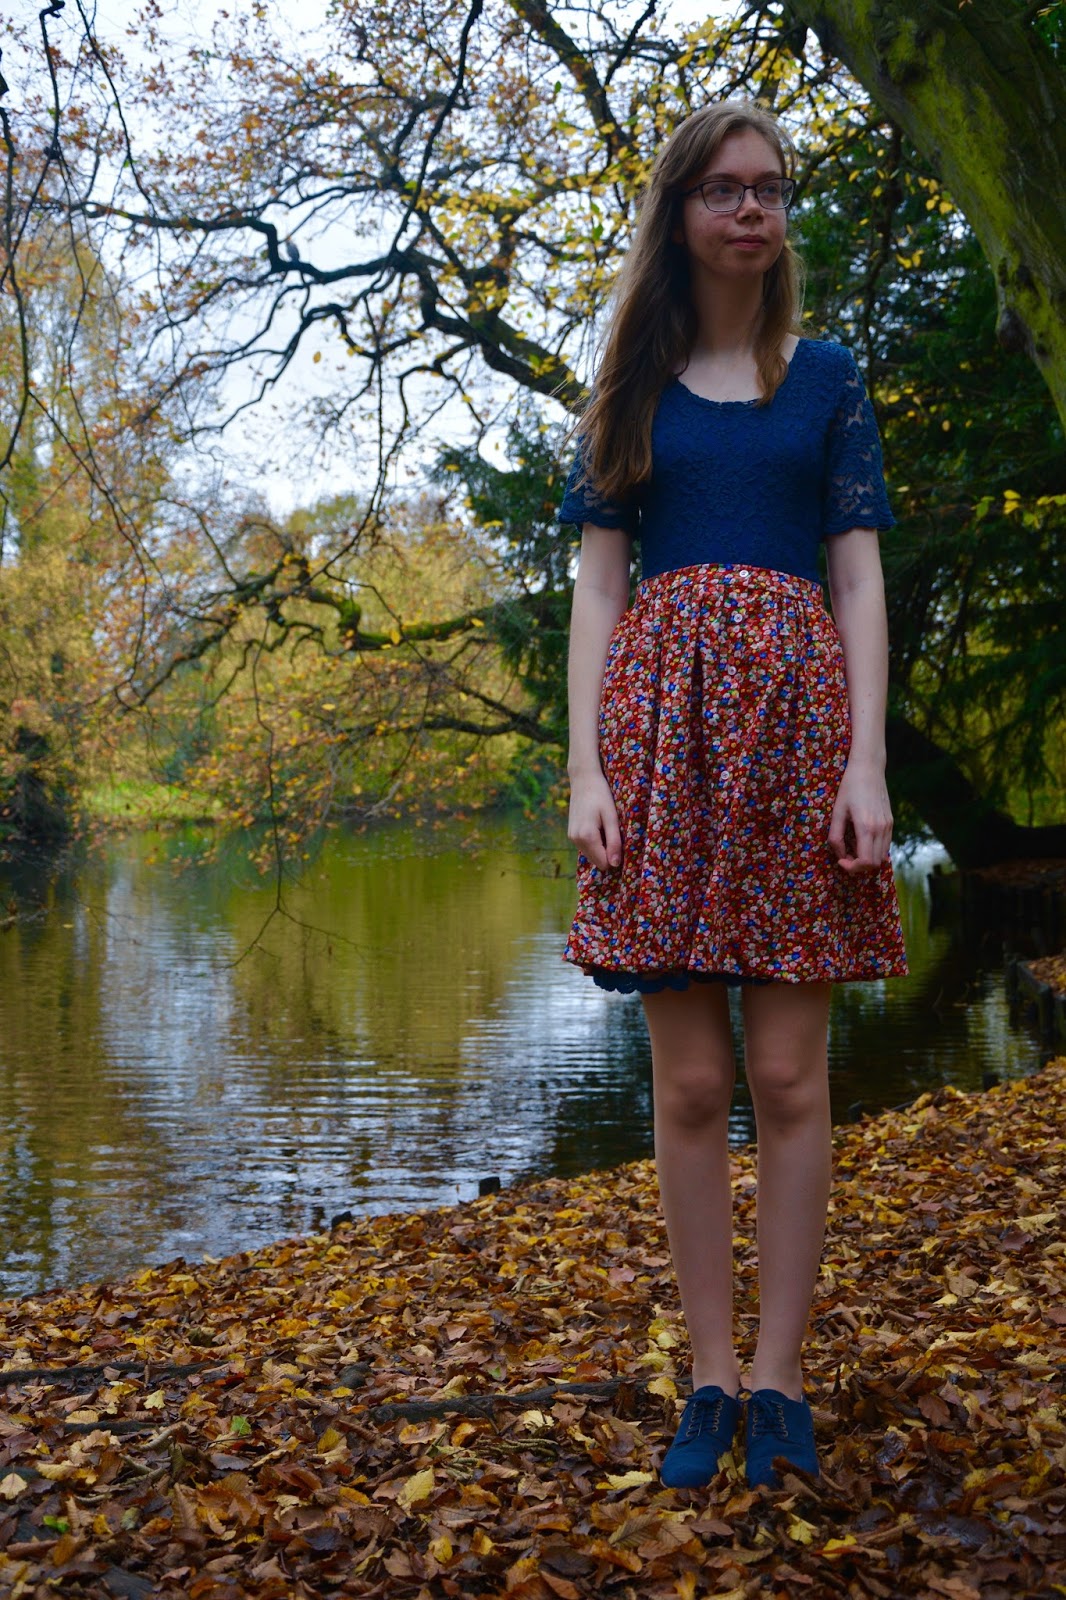
Hello all! This was one of those fabrics where I couldn't make up my mind what it was going to be. It was originally going to be a shirt, then a top with buttons at the shoulders, then a culotte playsuit. In the end I decided on a gathered button down skirt. I’ve made many things in the last couple of years, but a gathered button down skirt isn’t one of them! I managed to muddle along okay though.
I used the Deer and Doe Chardon skirt front for the basic skirt pieces and gathered them instead of pleating them. The skirt pieces aren’t too wide so the gathered effect is more subtle. The back was cut on the fold and the front had 3cm added on for the placket. The waistband is a basic rectangle. It’s the first time I’ve not had a bodice to gather the skirt to, so it was a bit of a trial and error to get the skirt to fit properly at the waist. After a bit of unpicking and re-measuring I was back on the right track.
The fabric is a really soft cotton poplin that drapes beautifully. It’s really easy to work with and finger presses really well, which is great because the iron lives 5 floors below my flat! I think the print is really versatile and can be worn all year round, with jumpers, tights and boots or a t-shirt and sandals.
There is a definite right and wrong side which I had to remember when making the plackets. I was pleasantly surprised at how nicely the buttonholes went in. Interfacing gave the plackets and waistband just a tad more stability. The buttons were spaced 2 1/2 inches apart. 


 For a clean a finish as possible I french seamed the side seams and slip-stitched the waistband and hem into place. I learnt at uni the other day that when I thought was slip-stitching I was actually whip-stitching! But this waistband was properly slip-stitched now I know how. The hem was turned up 2 1/2 inches to give it a nice weight to hang properly. 

Thanks so much to Minerva Crafts for providing all of the materials for this skirt and to Joanna Walton for taking such beautiful pictures.
Lauren xx


Saturday, 7 November 2015

Simple Knit Dress

Hello all! Today my face grins out of your screen from a beautiful part of the Cambridge Univeristy campus. In this past week I've had a reading week and I went to visit my friend Meghan who studies maths there, and she kindly took some pictures of my dress for me.

I wanted to try a more fitted silhouette, which I don't usually go for but I do quite like it and it is very easy to wear. There is a bit of wrinkling in the back, so I might add a pair of fish eye darts in the back so it sits smoothly.
Pattern-wise this dress is a real mashup. The top half is copied from a ready-to-wear top, the kimono sleeves are from By Hand London's Zeena dress pattern and the skirt is from a pencil skirt pattern, all blended together.
I have fabric for at least one more of these dresses and I'm on the look out for more! The fabric I used this time was a cotton jersey, which did okay but I think a thicker knit like ponte would be even better.
Thanks for reading and to Meghan for indulging me in a blog photo session.
Lauren xx


Sunday, 25 October 2015

Fabric dyeing experiments: Flour Paste

 In the last couple of days of my summer holidays way back in September I decided that I wanted to make a Papercut Patterns Waver jacket. And it had to be purple. I didn't have any purple fabric in the stash so I decided that it would be cheaper to dye some white fabric that I already had. And then I thought, why not make this extremely complicated, but also 100 times more interesting? So I did some research on different dyeing techniques and this tutorial on how to make a flour paste crackle effect caught my eye. It looked very cool and I decided to give it a try on a much larger scale, doing it with 1.5m of fabric, rather than 20cm.
I did make a small sample first just to check that it worked. I used fabric paint instead of dye, because it was on a much smaller scale. It looked pretty cool so I went full steam ahead with the real fabric.
I laid the fabric out on top of a ground sheet and some plastic sheeting and held it down with various things that were lying around. I then made a huge bowl of flour and water paste and set to it. It took quite a few bowls of flour paste to cover all of the fabric. Then I left it to dry.
When it was dry, I crushed it into a ball and started stamping all over it to get it to crack. The more cracks you have, the more dye you will be able to see. I did try using sandpaper but that was a bad idea because it wore holes in the fabric.
When you are done, it should look something like this:
Then it was time for dyeing. I used 2 sachets of purple dye from Harrison and Dunn. The colour in the end turned out to be a pretty light purple, so perhaps I should have left it in for longer. After dying it's time to rinse all of the excess dye out and all of the flour paste off. I had a friend over at this point and it took FOREVER. Mind you, there was a lot of fabric to be de-pasted. After we were sure that all of the paste was gone, we stuck it in the washing machine, hung it on the washing line and it was done!
I think it turned out so well! I'm super happy, and can't wait to make a Waver jacket with it. I had so much fun dyeing the fabric, and I can't wait to do more experiments in the future!
Thanks so much for reading, and to Meghan for standing in front of the sink with me for hours trying to get all of that paste out!
Lauren xx

Sunday, 18 October 2015

Floral Jersey Kielo Wrap Dress

Hello all! It's time for another Minerva Crafts project. Today I have to share with you my new favourite dress. It's so easy to wear and I never fail to recieve compliments when wearing it. If that doesn't make it a winner, I don't know what does.
The pattern I used was Named's Kielo wrap dress, which consists of 2 pattern pieces which are sewn together at shoulders and side seams and is then wrapped however you like. I've demonstrated how it looks unwrapped below. It was the first time I've used an overlapped pattern that needed tracing which I found fairly confusing, but sorted out in the end. 
I tend to wrap it across the front, bring the ties round the back and then knot them in the front, although you can also wear it unwrapped with the ties tied loosely in the back. I found that the underside of the wrap sometimes peeks out so I topstitched down the side seam to try and keep it at bay.
The pattern states that knit or woven fabrics can be used, and a used a beautiful knit that is both classy and comfortable. It's a fairly lightweight fabric and is silky smooth to the touch. I wouldn't know it was polyester by the feel of it. It drapes beautifully for the dress and the colour palette is all my favourites in one! Clear elastic was used to stabilize the shoulders and neckline.
Kielo is of course a maxi dress, but I decided that a shortened version would get a lot more wear. I eliminated the split at the center back because I can move perfectly fine without it. Because I was working with a knit, I finished the neckline with a band instead of turning it under. I turned the armholes under as specified in the instructions and regretted it. Next time, I'll do bands for the armholes as well. I also eliminated all of the darts because there didn't seem much point doing them with a knit fabric.
I think that's pretty much all I have to say about this dress! Thanks very much to Minerva Crafts for providing the materials for this dress and to Matt for taking blog photos for me!
Lauren xx