Monday 31 August 2015

Sashiko Francoise

Hello! Earlier this summer I went on my first solo trip to Grandpas, somehow successfully navigating the London tube system and getting to the right place at the right time. I needed a project to do without a machine and so asked Twitter what my options were. Susan of Measure Twice Cut Once suggested that I try my hand at Sashiko embroidery which was perfect.
 Sashiko embroidery is not something I've done before, but it went pretty smoothly with some internet research and a bit of improvisation. For those unfamiliar with the term, Sashiko stitching was originally a type of reinforment embroidery over worn and patched areas originating from Japan. However, now it can be used decoratively. It consists of a simple running stitch typically using white thread on an indigo background for a high contrast.
 I used the Tilly and the Buttons Francoise shift dress pattern, which I've made several times before. This time I blended the separate shoulder pieces back onto the main dress pieces for a dress with only 2 pattern pieces instead of 4. I wanted a simple background for my embroidery. Originally I found a design I liked and traced it with chalk on tracing paper, then attempting to transfer the chalk onto the fabric. This attempt was unsuccessful. Instead I decided to go with simple stripes that could be easily chalked onto the fabric with a ruler. The fabric was an old white cotton tablecloth with a fairly loose weave so the larger needle could easily pierce through the fabric. I then dyed it using a navy dye in the sink. It turned out a bit patchier than I would have liked so I probably should have stirred it more.
The tips that I picked up from various bits of internet research were to pick up several stitches on your needle at a time, as it will help keep the stitches straight. At the end of the row, leave some excess thread so it doesn't pull tight and pucker. Because the hand sewing I was doing was fairly simple it only took 2-3 days to finish. The lack of laptop did mean that I had a fair amount of otherwise usually occupied time.
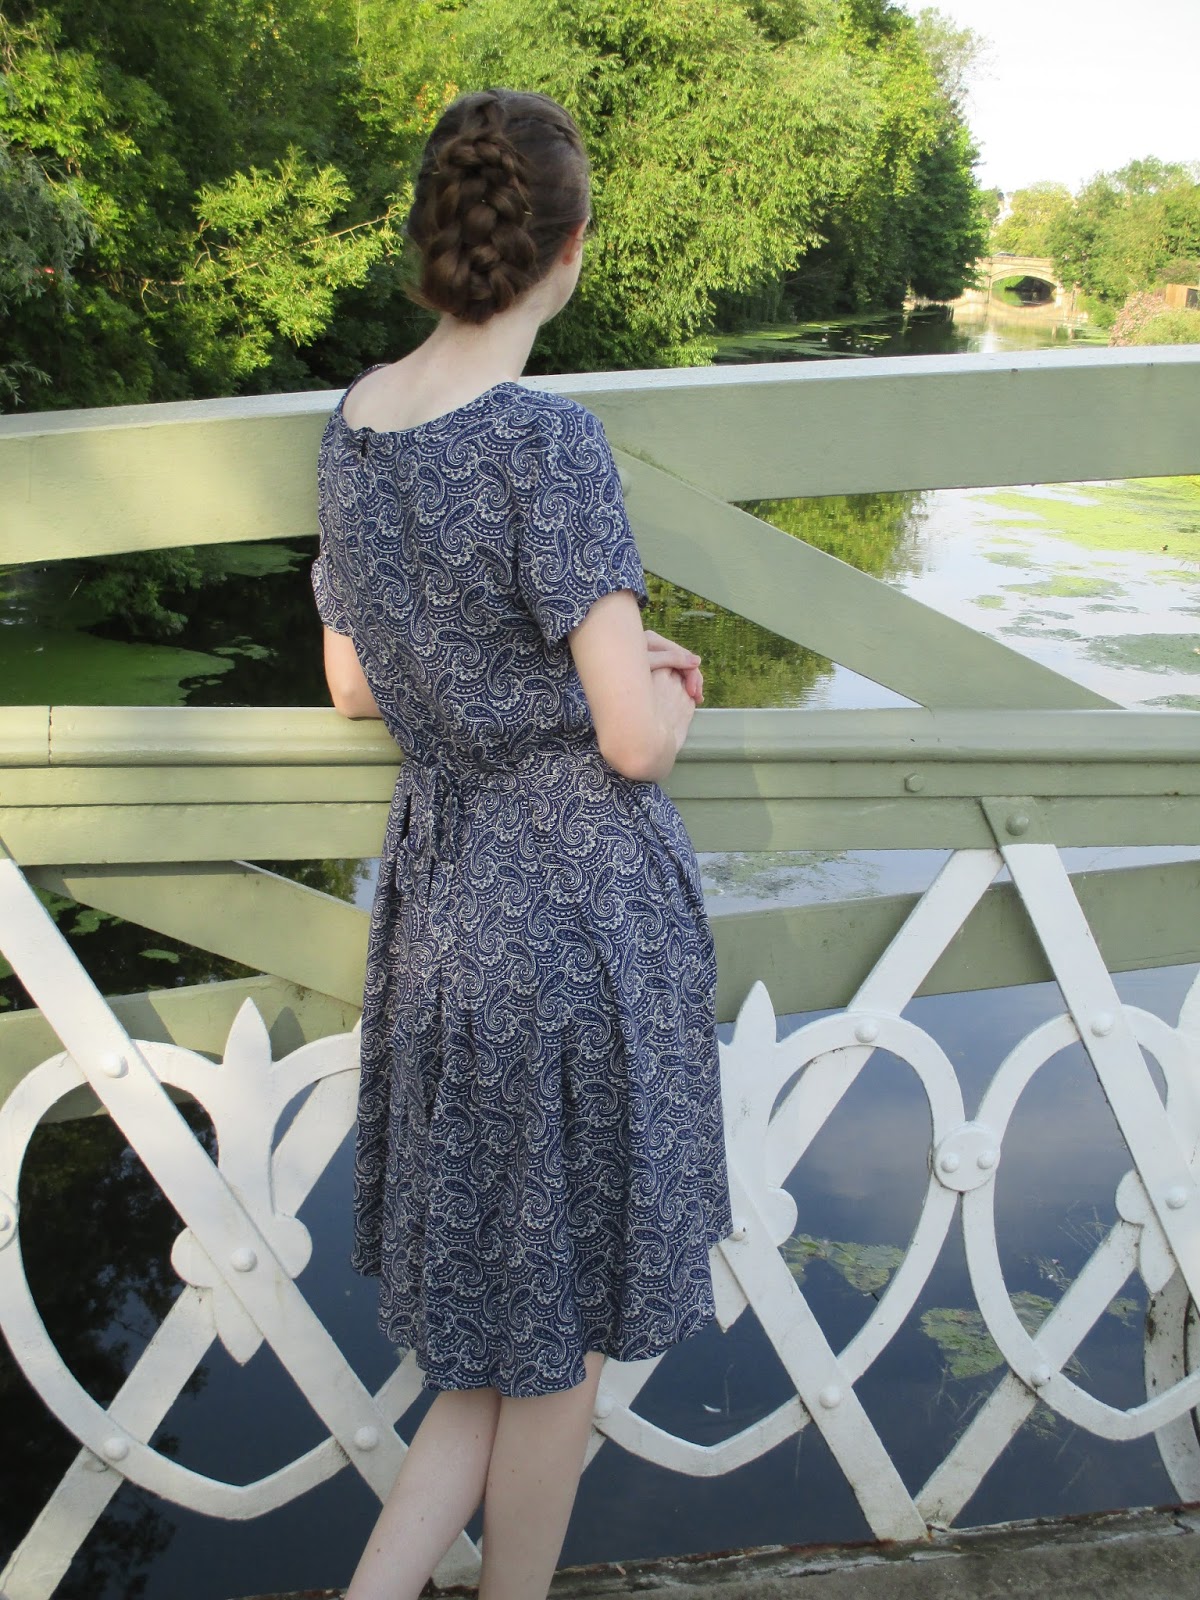
So, as soon as I got home I stitched the dress together, tried it on and sighed. It just wasn't right, and had a number of issues that needed fixing. It went into The Pile for a couple of weeks and I picked it up again after my operation. I took a fair bit of excess out of the center back seam to make it slightly more fitted. The shoulder seams were taken in to make the neckline less gapey. Next time I'll take out some width at the centre front because the neckline does still gape a bit I also raised the darts so they actually hit my bust. In hindsight, the diagonal dart wasn't a great idea because it messed up my stripes.  A bust dart would have been a better idea. The hem was too dramatically A line for my liking as the fabric is so stiff, so I taped that in by 2 inches on either side. 
Despite not being able to stripe match the side seams, I did manage the center back seam pretty well! In regards to the insides, raw edges are all overlocked. Neckline and armholes are bias bound as per usual. The hem is turned up 1 inch and slipstitched into place. 
After all of the fitting changes I'm so happy with how the dress fits now! I think you get double the satisfaction when you turn a project from a wadder into something you love. It will be great in winter for layering under with shirts. It was fairly chilly today so I layered my white archer under it, which kept me warm. It's great to be able to transform a tablecloth into something so different and unique.
 Thanks for reading and to Ed for snapping these on the way home from visiting friends and to my parents for waiting patiently in the car while we shot these.
Lauren xx

Saturday 22 August 2015

Paisley Zeena Dress

Hi everyone! Today I have to show you my first post-op make. For those of you who don't know, I had my upper and lower jaw broken in surgery 2 and a half weeks ago to correct my overbite. The swelling has gone down a fair bit, but there is still a way to go. It's weird to look at these pictures, because I haven't quite come to terms with my new face and smile yet but I have to remind myself that it's not about my face, it's about the dress!
So, this is my version of By Hand London's latest pattern; the Zeena dress. I thought the pattern would be great with several of the fabrics in my stash but it turned out that I didn't have enough of any of the fabrics to make the dress. The only thing to do was to buy some new fabric! I was looking for viscose for the drapyness and found this paisley beauty on ebay. 2m of it promptly ended up in my basket.
My overlocker had decided to give up on keeping the thread in any fabric it stitched through so it was out of action. That meant that I had to find other ways of finishing the seams. I was originally going to do french seams for everything, but after french seaming the bodice to the skirt the pleats were all out of sync which just wouldn't do. Instead I sewed the seam right sides together as normal, lining up the pleats properly that time. Then I trimmed the seam allowance of the skirt piece, folding the bodice seam allowance on top over it and slipstitching. I think the weight of the zip is dragging the waistline down in the center so maybe next time I should add a waist stay?
After playing around with finding enough fabric for the pocket pieces, I got carried away with french seaming the side seam, completely forgetting about the pockets existence. I'd already unpicked one french seam, and I decided to sacrifice the pockets rather than unpicking another. 
 The center back seam allowances were pressed open, the raw edges tucked under and slipstitched for a clean finish. For the hem I tried something new. I machined a line of stitching 1cm from the edge and ironed it so the line was visible from the wrong side of the dress. That made it super easy to turn the raw edge under and slipstitch. There was a lot of slipstitching in this project.
The neckline was far too low for me so I remedied that by cutting quite a wide bias strip from the scraps to make a neckband, which was sewn right sides together. I folded the raw edge under about 0.5cm and ironed. That edge was then slipstitched to the wrong side of the dress to create a neckband. Ideally I should have inserted the zip before the neckband for a cleaner finish but I was in a hurry to see whether it would work or not!
After sewing the invisible zip in as I usually do I was disappointed with how visible it was. So, I thought I'd try sewing it again, trying to get closer to the teeth. Having 2 lines of stitching made all the difference. I've lost a bit of weight from having a liquid diet (4 weeks to go!) so I made a tie belt to cinch it in a bit.
I cut the skirt to the longest length, but removed 2 inches which ended up being used for the tie belt. I love the pleats, and I think it would be interesting to make the dress in a slightly heavier fabric and see how it sits.
That's all for now! Thanks very much for reading and to Dad for taking photos!
Lauren xx

Saturday 15 August 2015

Border Print Holly Dress

 Hello all! Today I have to show you the summer dress of summer dresses: my border print Holly dress. I don't wear a lot of green, but I've been consciously trying to change that. When I saw this fabric in one of the department stores in Hamburg in the Easter holidays, 2m for £10 I had to snap it up.
I knew that it had to be a dress with a full, gathered skirt to fully show off the border print but I had a couple of different options for the bodice. I ended up choosing the cowl neck bodice from the By Hand London Holly jumpsuit pattern. It was a good choice, because I think it goes so well with a gathered skirt! 
The skirt is cut on the cross-grain so I could display the border print properly. The border print was on both sides of the fabric so I just cut straight down the middle. The skirt is longer than I usually go for, but it's a very elegant length. I like it.
 The bodice was slightly sheer, so I decided to line it with a white cotton. As to not disrupt the cowl, I pleated the cowl as marked in the front bodice in the fashion fabric, and then cut around that for the lining piece, so it lies flat. The back pieces are exactly the same as the fashion fabric. Using the darker part of the fabric for the straps was a good plan. I love the contrast.
 I didn't make a mock up, and the sides ended up being taken in quite a bit, but other than that I'm quite happy with the fit. The top of the bodice gapes a bit, so next time I'd probably place the strap slightly towards the centre on each side. I do really like this dress, and it's a shame that the weather hasn't been nicer so I could wear it more.
Thanks so much for reading and to Ed for taking the pictures!
Lauren xx

Monday 10 August 2015

Emerald Swimsuit

Hi Everyone! When choosing the fabric for my August Minerva make I thought that I'd hope the best for the weather and brave some foreign waters with swimsuit making. This was such a fun project to figure out. I'd forgotten how much I love drafting patterns. I decided to self draft the bikini top, because I couldn't find any patterns with the design that I wanted. Although, please note that all of the following steps were completely improvised, and are by no means the 'proper' way of doing things. The fact that the lycra has so much stretch means that fitting is a tad easier! The lycra has a matte and shiny side, and I used the matte. 
 As I don't have a swimsuit block, I thought the quickest way to get one was to use one of my existing swimming costumes as a base. So, I folded the swimming costume at the centre front and pinned it to the pattern paper. I pinned exactly on the lines of the side seam so I could join the dots when the cozzie was unpinned. Then I had a basic template to adapt. I then drew the style lines that I wanted; a V neck and a separate bust section, ending up with 2 pattern pieces.
However, there was still a bit to do with the pattern, because I wanted some gathering detail at the bust, so I slashed and spread the cup pattern piece for some extra fullness. Then I checked that the pattern piece covered the cups included in the kit. They were more solid than I was expecting them to be, but they do offer a lot of security. After that I added seam allowance, grainlines etc. and cut them out of my emerald lycra! Below is what the 3 front bodice pieces looked like when cut out.
Then it was time to sew them together! I was really impressed with the quality of the clear elastic, as previous experience with different brands weren't so positive. I first gathered the cups with my serger, but then decided that it would actually be more sensible to do that with the elastic, so I did that instead. I also used the elastic to stabilise the V-neck. When the front was sewn together, I folded that in half. pinned it to the fabric and cut out the back that way. The back was sewn at the side seams to the front and straps of a random length were cut and sewn on to be trimmed down later.
I then cut out all of the bodice bodices again, to serve as a lining. When I had 2 identical tops I pinned them right sides together and sewed all around the top of the back, the armholes, the straps and the front so that all of the inside seams would be hidden. Then I turned everything out the right way, and put the cups between the 2 layers. The hem was overlocked with elastic to stabilize it and turned over and top-stitched. Oh, and all around the top of the swimsuit was also top-stitched. Then the top was done!
For the bottoms I originally tried Ooh Lulu's free pattern for July; the Hilda bike shorts. They were a complete palava to sew, and in the end I decided that they didn't work for me. So then I tried So Zo's free pants pattern which had a really easy to follow tutorial. I did lengthen them so they would hit higher up the waist for a more vintage vibe. I accidentally printed them not-to-scale but I hoped that would work in my favour as I'm normally a size 6 anyway. It did at the waist, but I needed some extra fabric at the leg holes. Remembering Kitschy Coo's barrie briefs I decided that binding was the way to go. It worked, and is barely noticeable!
The bottoms ended up looking quite good, but they are so uncomfortable to wear! Maybe there isn't enough coverage? But I am really pleased with how the top turned out, although I do wish that I had gotten a sharper point at the V-neck. Unfortunately I won't be able to wear my new swimsuit for a while because I had a jaw operation last week on my lower and upper jaw, so am currently recovering from that!
That's all for now folks! Thanks for reading, to Minerva Crafts for the fantastic kit and Edward for taking photos!
Lauren xx