Sunday, 25 October 2015

Fabric dyeing experiments: Flour Paste

 In the last couple of days of my summer holidays way back in September I decided that I wanted to make a Papercut Patterns Waver jacket. And it had to be purple. I didn't have any purple fabric in the stash so I decided that it would be cheaper to dye some white fabric that I already had. And then I thought, why not make this extremely complicated, but also 100 times more interesting? So I did some research on different dyeing techniques and this tutorial on how to make a flour paste crackle effect caught my eye. It looked very cool and I decided to give it a try on a much larger scale, doing it with 1.5m of fabric, rather than 20cm.
I did make a small sample first just to check that it worked. I used fabric paint instead of dye, because it was on a much smaller scale. It looked pretty cool so I went full steam ahead with the real fabric.
I laid the fabric out on top of a ground sheet and some plastic sheeting and held it down with various things that were lying around. I then made a huge bowl of flour and water paste and set to it. It took quite a few bowls of flour paste to cover all of the fabric. Then I left it to dry.
When it was dry, I crushed it into a ball and started stamping all over it to get it to crack. The more cracks you have, the more dye you will be able to see. I did try using sandpaper but that was a bad idea because it wore holes in the fabric.
When you are done, it should look something like this:
Then it was time for dyeing. I used 2 sachets of purple dye from Harrison and Dunn. The colour in the end turned out to be a pretty light purple, so perhaps I should have left it in for longer. After dying it's time to rinse all of the excess dye out and all of the flour paste off. I had a friend over at this point and it took FOREVER. Mind you, there was a lot of fabric to be de-pasted. After we were sure that all of the paste was gone, we stuck it in the washing machine, hung it on the washing line and it was done!
I think it turned out so well! I'm super happy, and can't wait to make a Waver jacket with it. I had so much fun dyeing the fabric, and I can't wait to do more experiments in the future!
Thanks so much for reading, and to Meghan for standing in front of the sink with me for hours trying to get all of that paste out!
Lauren xx

Sunday, 18 October 2015

Floral Jersey Kielo Wrap Dress

Hello all! It's time for another Minerva Crafts project. Today I have to share with you my new favourite dress. It's so easy to wear and I never fail to recieve compliments when wearing it. If that doesn't make it a winner, I don't know what does.
The pattern I used was Named's Kielo wrap dress, which consists of 2 pattern pieces which are sewn together at shoulders and side seams and is then wrapped however you like. I've demonstrated how it looks unwrapped below. It was the first time I've used an overlapped pattern that needed tracing which I found fairly confusing, but sorted out in the end. 
I tend to wrap it across the front, bring the ties round the back and then knot them in the front, although you can also wear it unwrapped with the ties tied loosely in the back. I found that the underside of the wrap sometimes peeks out so I topstitched down the side seam to try and keep it at bay.
The pattern states that knit or woven fabrics can be used, and a used a beautiful knit that is both classy and comfortable. It's a fairly lightweight fabric and is silky smooth to the touch. I wouldn't know it was polyester by the feel of it. It drapes beautifully for the dress and the colour palette is all my favourites in one! Clear elastic was used to stabilize the shoulders and neckline.
Kielo is of course a maxi dress, but I decided that a shortened version would get a lot more wear. I eliminated the split at the center back because I can move perfectly fine without it. Because I was working with a knit, I finished the neckline with a band instead of turning it under. I turned the armholes under as specified in the instructions and regretted it. Next time, I'll do bands for the armholes as well. I also eliminated all of the darts because there didn't seem much point doing them with a knit fabric.
I think that's pretty much all I have to say about this dress! Thanks very much to Minerva Crafts for providing the materials for this dress and to Matt for taking blog photos for me!
Lauren xx


Sunday, 11 October 2015

Dotty Ginger Jeans

Hello all! I made some new jeans, and they are awesome. I seem to be going through a trouser phase and these jeans have been fulfilling my trouser needs perfectly. 
I used Heather's Ginger Jeans pattern again, this time sticking to the skinny leg. I love my flares, but I needed some skinny jeans for variety. I added 1 inch to the waist so they would be more highwaisted on me, but I would add even more next time as they still don't quite sit at my natural waist.
The fabric is a lovely stretch denim from Goldhawk Road, and 1.5m cost me £9. The dots were originally white, but in the pre-wash they turned a shade of light blue. Maybe one of those colour catchers would have prevented that? The slightly stretchier nature of the fabric means that they are more comfortable to wear than my flares. Because of this I made no changes to the pattern, although the legs were too tight last time, but that was a mistake. The legs came out too tight again at the knee, so I unpicked and sewed with a teeny tiny seam allowance. Next time, add some extra room at the knee!
I didn't have any top-stitching thread on hand, so I just used a navy regular thread and didn't make much of a feature of it. I used a contrasting floral for the waistband but really should have stuck with the denim, because it peeks out at the side of the fly. The pocket bags were cut out from scraps of gingham that I had lying around. All raw edges were overlocked. I didn't do flat-felled seams this time around.
As soon as I find some more denim I'm going to make some more, because these have been such a workhorse over the last couple of weeks. And I need some new tops to wear with them! As always, thanks very much for reading and to Edward for taking the pictures!!
Lauren xx


Saturday, 26 September 2015

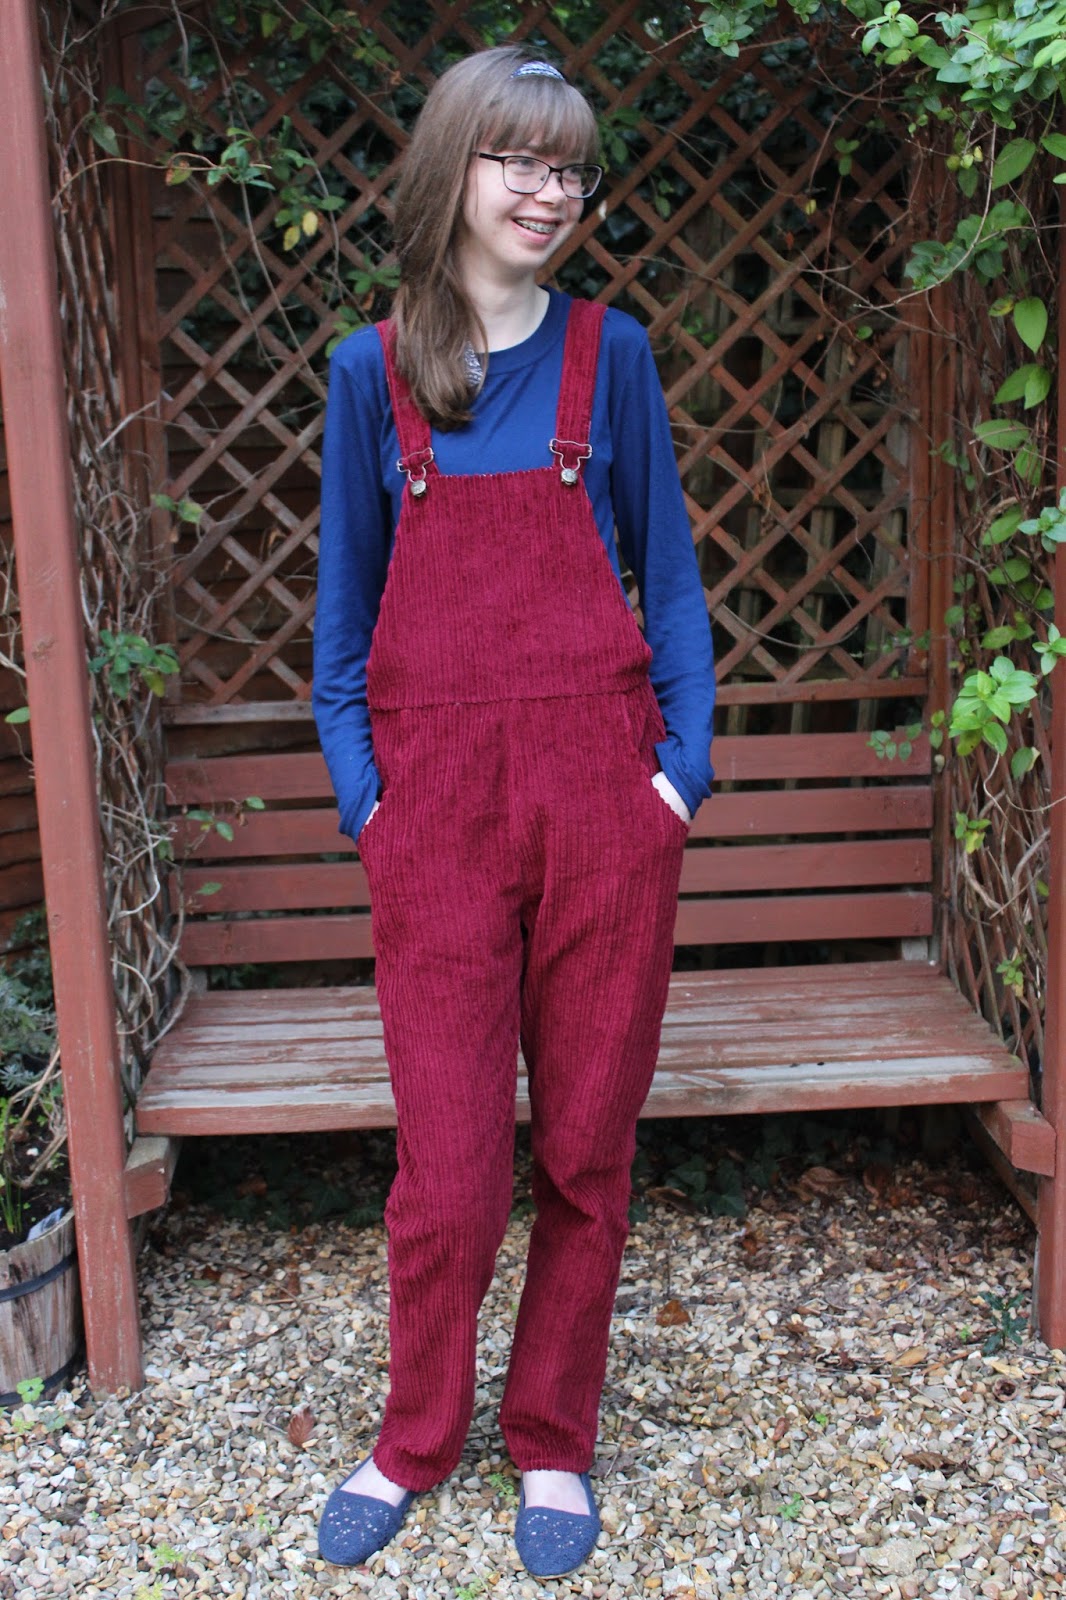
Corduroy Turia Dungarees

Hello all! I've been at uni for just over a week now and lessons commence on Monday. Freshers week has been a lot of fun, but I can't wait to get started on the course! As promised I knocked up some corduroy Turia dungarees before I left as I thought they would be a crucial piece in my autumn/winter wardrobe this year. You can see my floral turia's here and tie dye turia's here.
I did make a couple of changes to the pattern. I made the patch pockets on the hips the normal pockets found on jeans as I just prefer how they look. I also added 2 inches to the top of the back pattern piece as I thought that would help with the issues I've had with the straps being too short previously. I also made the strap pieces 2 inches longer. 
Corduroy is quite a heavy weight fabric, so I decided to sew all of the trouser seams with a 1cm seam allowance instead of 1.5 to make sure that they wouldn't be too tight. I thought the straps would be too bulky if the front and back were both corduroy so I lined them with a floral cotton in my stash. I also decided to line the bib with the same cotton, which gives a much nicer finish.
I thought I was being really clever, cutting the lining pieces smaller than the corduroy so it wouldn't peep out, but I trimmed the seam allowance after it was sewn so that effect was lost. I bought some corduroy top-stitching thread especially for this project but top-stitching was just completely lost in the texture of the corduroy. Looking at the pictures now, the pockets seem really small and out of proportion. These dungarees are not my usual style, and they feel rather masculine to wear, but I like them! They will be really warm and cosy for winter.
Thank you very much for reading and to Edward for taking the pictures! 
Lauren xx

Sunday, 20 September 2015

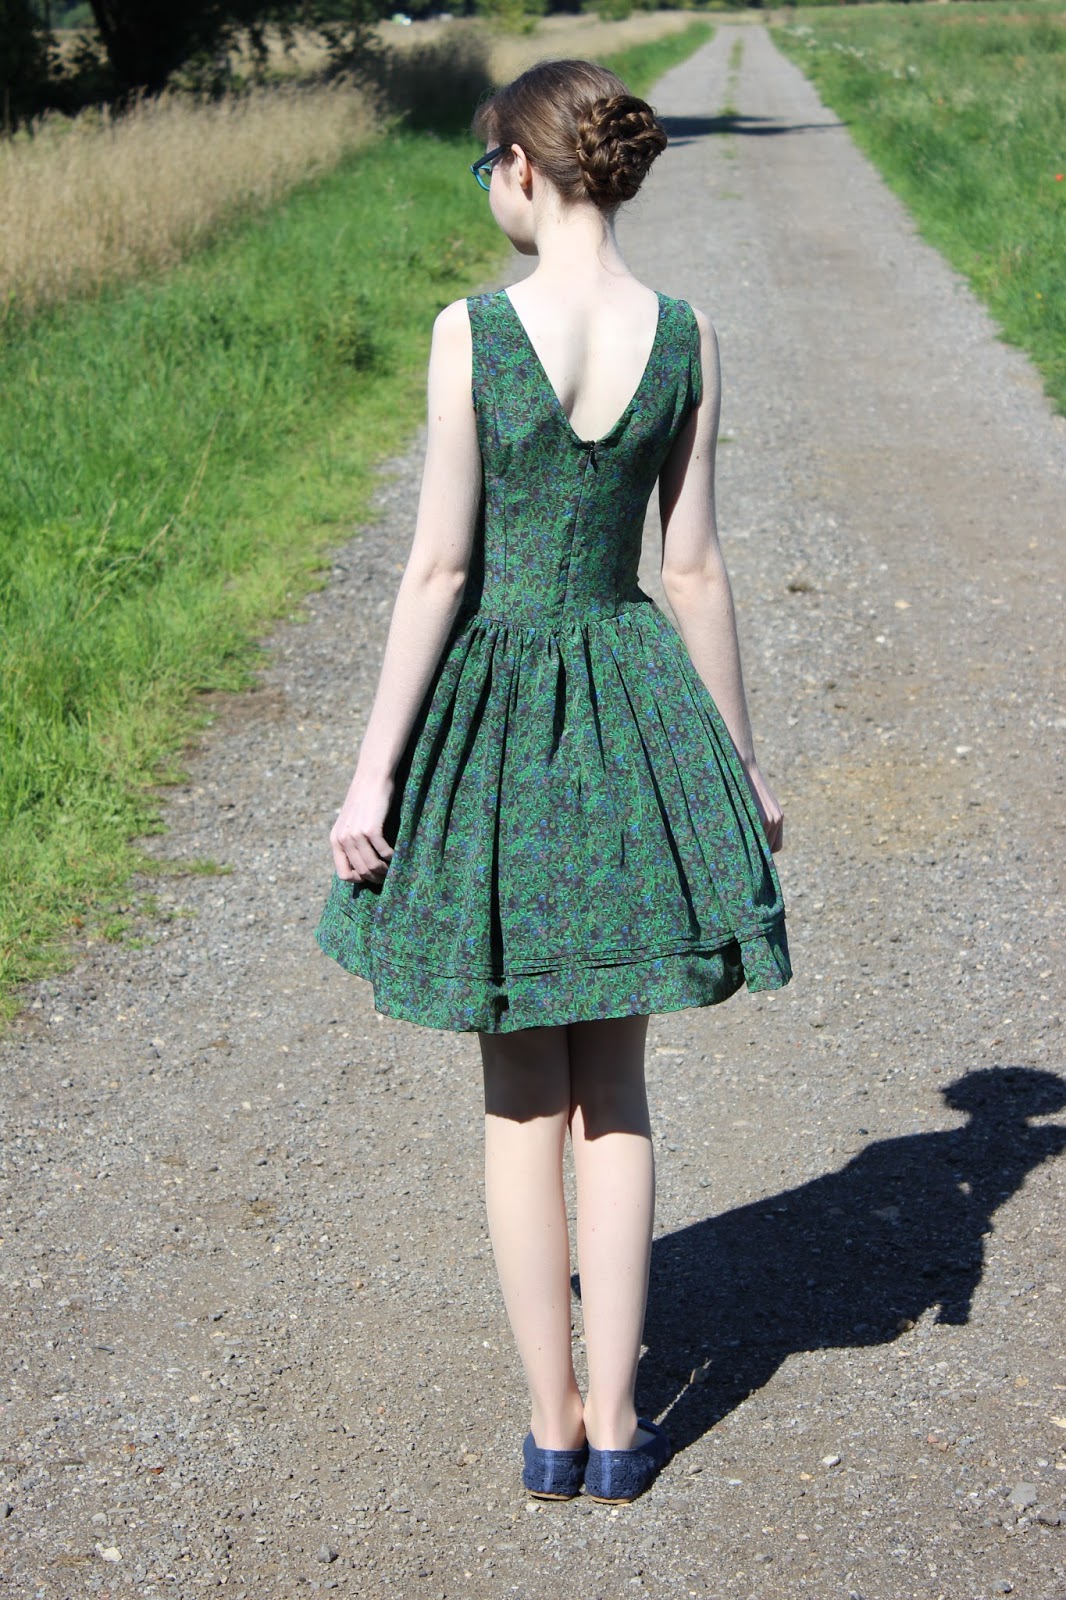
Silk dress with tuck details

Hello! It's time for another Minerva Crafts Blogger Network project! This has been one of the projects which has been a thousand different designs in my mind, but I'm pretty happy with the design I finally settled on. I was pretty much directly inspired by the dress that Tea made here. 
The fabric is a delicious silk with a subtle sheen to it. I hand washed it in the sink and then hung it out to dry, instead of chucking it in the washing machine. It was pretty slippery and kept falling off the ironing board, but it ironed beautifully using the silk setting on the iron. The skirt drapes well with or without a petticoat. (The photo above is without petticoat and below is with petticoat).
For the bodice tucks I decided that the easiest way to do things was to cut out a rectangle a couple of inches wider and longer than my bodice block. I did 3 tucks across the rectangle, then I placed my front bodice pattern onto the fabric, making sure that the tucks were where I wanted them, then pinning and cutting out. This saved me slicing open my bodice block and working out the maths.
The skirt is 2 gathered rectangles the width of the fabric. I measured 16 inches down from the top of the rectangle and marked it with a notch. Then I put 8 more notches a 1/2 inch apart below the first one. 3 notches for each tuck. I was worried that the tucks would get lost in the print, but they are fairly noticeable. They would have a greater impact on a plain fabric.
I was originally going to have the invisible zip in the side seam, but I wanted a french seam there. Because the side seams are shorter than center back seams as they start under the arm, the zip wouldn't be long enough for my back bodice block as it was. So, I decided a V neck was in order. I love how elegant it looks! I wanted to respect the silk and make the insides as clean as possible. I was planning on french seaming everything but then I realised gathering and french seams would be a nightmare combination. So I hand flat-felled the waistline seams and french seamed the side seams.
 The centre back seam was pressed open, the raw edges pressed under and slip-stitched. The neckline and armholes are bias bound from the leftover scraps of the silk. The hem was turned under twice and slip-stitched. Doing a lot of hand stitching adds a lot of time to a project, but it gives me a higher sense of satisfaction because it's not equal to RTW, it's better than RTW. I haven't yet decided whether I want to save it for special occasions or wear it everyday. I guess it's like using the best china everyday.
Thanks to Minerva Crafts for providing the materials and to Edward for letting me drag him out of the house to take pictures somewhere other than the back garden!
Lauren xx

Sunday, 13 September 2015

Button up jersey top

The night before my jaw operation I realised that a button up pajama top would be a lot easier to get on and off than the tees I normally use as pajama tops. Luckily I had some of the super soft floral jersey left over in my stash which was perfect for this top.
The top is self drafted, but it's pretty much a rectangle.  As a pajama top it didn't need to be fitted. I was a bit worried about doing buttonholes in the lightweight jersey, so the plan was to stabilize the buttonbands with interfacing. When I looked for interfacing in my stash it was no where to be found so I used calico selvedges instead, which worked fine. The buttonholes actually turned out surprisingly well!
I chose binding for the neckline and turned the hem over twice. The armholes are raw. I sewed the whole thing on my sewing machine because the overlocker was acting up. It's okay, but the finish is so much more professional with an overlocker.
I ended up wearing hospital gowns when in hospital, but this top came in handy when I got home. It was easy to get in and out of without interfering with my jaw. In fact, making it was a good distraction from thinking about my impending op.
Thanks for reading and to Ed for taking pictures!
Lauren xx

Sunday, 6 September 2015

Autumn/ Winter capsule wardrobe planning 2015

In the last few weeks I've had to decide which clothes I want to take to uni and I thought making an Autumn/Winter capsule wardrobe would be a good idea. I decided on a red, green, purple, navy and black for a colour scheme. Below you can see quick sketches of what I've decided to take. The highlighted items are yet to be made. The list has changed pretty dramatically with items being added and taken away. Since I took this photo 2 items have been crossed off. At the moment the capsule consists of 29 pieces, but that could be subject to change. 
Instead of showing you all of the items of clothing I already own, I thought I'd focus on things on the list that are yet to be made. All of the fabric was acquired at a fabulous Goldhawk Road shopping trip with Claire. All of the modeled photos used are pinned on my wardrobe architect pinterest board.  Apologies for my rough sketches. I clearly need to invest in a Fashionary.
 First up, are some dotty Ginger jeans. I've not been so happy with my flares, as the denim I used for those is pretty stiff and cardboard like with little stretch. This dotty denim is stretchier so all should be good. I'd like to make the high-waisted skinny jean version this time around.

 I wear my 2 pairs of Turia dungarees all the time, and I think some burgundy corduroy dungarees are going to be so cosy!
I'd like to use the Zeena dress pattern as a base for a pleated skirt, with some horizontal pin tucks near the hem for some interest.
I've had this grey wool in the stash for years and I haven't known what to make from 1 metre of it. It's been simmering in my brain and I think it would make a great pair of winter shorts to wear over thick black tights.
Lastly, an Anderson blouse in some green polycrepe. I'm really intrigued to see how this one turns out.
Hopefully I'll have some spare time at uni to make these a reality!
Thanks for reading,
Lauren xx